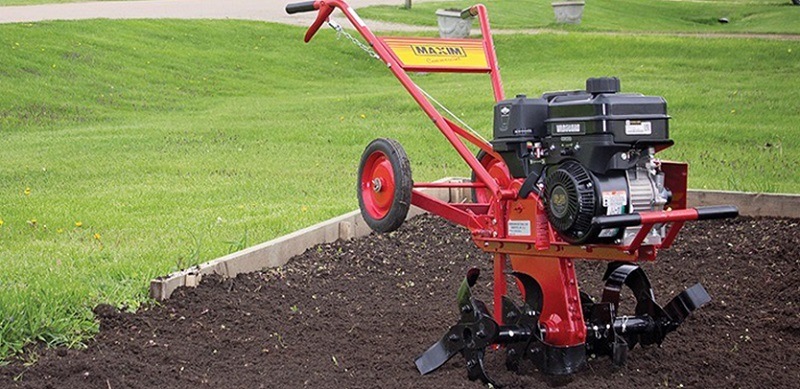
Your garden needs to be rototilled to help your plants germinate and increase their lifespan. While you can till manually with just a shovel and a rake, you'll end up wasting time. Rototillers consists of strong, stainless steel blades that grades and rakes through your soil without causing damage to the weeds.
Rototillers are efficient at getting the job done and keeps your soil clean and ready for the next growing season. Following these steps ensures your plants will have a safe area to germinate and produce high-quality fruit and food.
Read on so you'll have a better understanding of your rototiller and keep your plants growing safely and correctly.
What Is Rototilling
A rototiller is an electric or gas powered lawn tool that lets blades break and churn soil. Rototillers come in different models and sizes and can be driven, pushed, or pulled. The most common form is a push rototiller, which is similar to a lower mower in regards to size.

Push rototillers have a set of large tires placed in the front. This helps push over the soil while the tines revolve around its back axle. Your tines can be set to till at specific depths; it can dig down from a few inches to a foot.
But, your rototiller endures a great deal of stress when it cuts through the ground. This can result in unpredictable movements and makes it physically challenging to operate. Invest in a protective shield to be safe from the tines and prevent sudden injury.
The easiest alternative to a rototiller is spading or shoveling the ground and turning it by hand. However, this can be a labor intensive process that's impractical when a large area has to be covered or in hard soil.
Since it might be difficult to obtain a farm tractor, rototilling is the only economical choice for mechanically turning your ground. Also, rototillers are less expensive than any tractor.
Rototilling Preparation
Rototilling your garden is all about preparation. Here are a few tips to help rototill your garden more effectively.
- Before rototilling, you need to assess the size of your garden. If it's a small garden of only a 3-6 feet long, you'll have to till manually.
- You must always wear protective equipment. Eye protection is a great idea as it protects your eyes from receiving dirt and debris. Also, wear protective shoes to prevent getting injured from the rototiller's blades.
- When making paths through your garden with a rototiller, take the longest path. This ensures that you'll cover more space without spending too much time in one area.
- The best time to rototill your garden is during the spring and fall periods. During this time, the soil will be at its recommended temperature (50°F). If it's too cold, your soil will become too stiff, your plants will and unable to till. Hot temperatures will dry out your soil faster, making it harder for the plants to grow naturally.
Rototilling Weeds
For users who can't remove weeds from the ground manually, you'll have to invest in a small rototiller. It will remove the weeds in the garden without causing too much damage to the soil.

Lightly till around the plants and along paths to churn up the soil. This step exposes the weeds to the drying sun and keeps your garden clean and ready to grow before the fall season. A light rototilling every two weeks will go a long way in preventing the weeds from taking over your garden.
How To Rototill Your Lawn
Rototilling lawns require a bit of work. Whether you're planning on rejuvenating an old farm or installing a new one, rototillers can help level the ground as it begins to turn to soil. Tilling is a helpful practice whether you're trying to remove old grass to plant new, healthier grass.
If you don't own a roto tiller, rent one at your local garden center or rental agency. If possible, find a rototiller with tines located behind the wheels since they are more easier to operate. Here are some steps to help you rototill your lawn:
- Pick up rocks, sticks, and other debris from the lawn. With a sod cutter, cut and remove the old sod strips in the garden. Alternatively, you can directly till the current grass into the soil, but it won't remove long roots from persistent weeds.
- Water your soil if the ground is dry. Add water to soak the soil at least 2 inches deep. We don't suggest that you till in mud, but the task is a lot easier if the ground isn't too hard. Let your soil dry before proceeding. If your damp soil doesn't hold things together in a clump, you're ready to till.
- Set the depth bar of your rototiller to till about 4-6 inches deep. If your tiller has a guard or door over the tines, place the cover down. This stops the tiller from picking up roots and rocks placed deep underneath the soil.
- Cover your lawn with 2 inches of fertilizers or composted mulch. Use a garden rake to level amendments on top of the soil.
- Completely go through the entire lawn, either existing grass or bare ground. Don't leave any gaps between the rows. Make sure that you don't till close to the trees because you'll damage the roots.
- Till the soil from a different direction. For instance, if you till in a north-south direction the first time, till in an east-west pattern the next time.
- Smooth over the ground with a garden rake. Now your ground is ready to plant new grass or install sod.
Final Thoughts
It doesn't matter if you're a professional farmer or a gardener trying to harvest your plants. Rototilling will make the process easier and saves you money in the long run. With these tips, you'll create a beautiful garden that can survive through each season.


